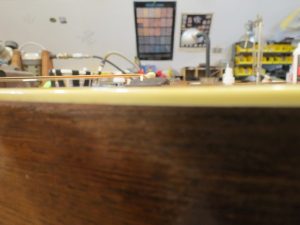
Ad you can see the rear of the bridge is way up. The top has sunk and now has a belly that is disturbing. The first thing I had to do was determine exactly what was going on. The owner, at some point, had taken it to two different repair shops. The work was amateurish.
The issues were two-fold:
- the belly and
- how to undo the previous work and correct the problems.
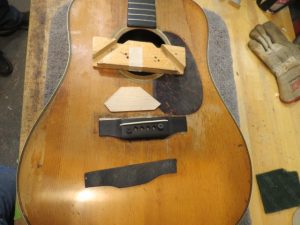
The owner told me that repair guy number one did a patch. This involved a spruce patch from the intersection of the X brace to the tone bar. This was placed with white glue. The guitar bellied right away and was taken to repairman number two. He installed an oversized bridge and bridge plate. He used super glue or epoxy on the plate and tied them into the X braces as they were “loose”. And again the top bellied. It took nearly 8 hours to get the plate off the top.
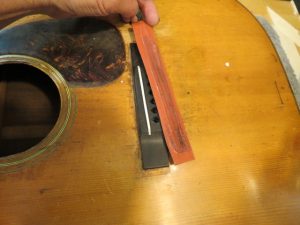
My first course of action was to try and get it apart to see just what I could do. I decided to first pull the bridge, and using a heat blanket and spatula I managed to get the bridge off.
What I saw was concerning.
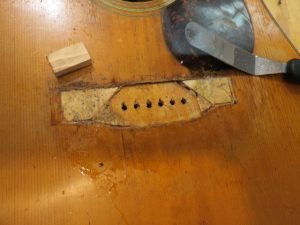
Here you can see that they had inlaid a series of pieces on the spruce patch. I tried moisture and heat and while some of the top separated some seemed to hold fast. I used my spatula to separate the top as I applied heat underneath. This was not easy and while the pictures don’t show it there were visible repaired cracks.
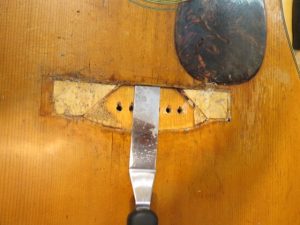
I took this as far as I could and then used DeglueGoo and let it soak. Checking on it every ½ hour, after 3 hours I managed to get the top patch apart and off the top.
The upper tone bar was loose and would be reglued later. The plate that I got out seemed to have a mixture of CA, epoxy, and other assorted glues. The previous top crack repairs did separate from the DeglueGoo but that would help make this a better repair. So, with all the work done so far, I have clamped the top to flatten it and dry out. I will let this set 2 days before looking at it again.

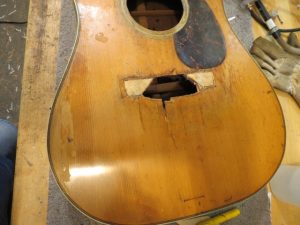
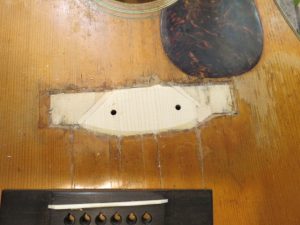
Once the top was cleared of all the bad repairs I could begin the restoration of the top structure. The previous repairs also hid some bad repair underneath as well so I had to add some fillets to fill lost wood and fill the area of the brace notches. I needed to get this structure to a point where it would be able to hold the stress of the bridge.
All the top cracks and loose braces were addressed and reglued.
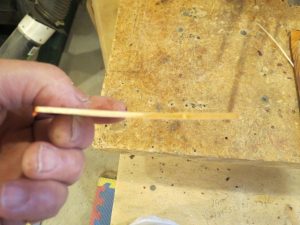
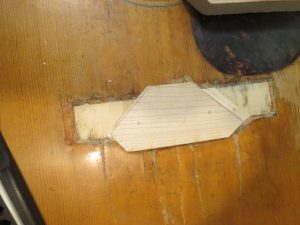
This took a good bit of time but I managed to get everything to fit and glue flat. The fillet I used on the top to go under the bridge needed to be glued and secured to the top. End grain does not glue well so I used a feather joint to get more face grain so that the ends are more secure.
This is the filler prior to gluing. It took a good bit of time to feather the top and bridge patch until the ends mated perfectly. Then I needed to make a caul so the edges mated and were clamped perfectly. This process assures continuity on the top and makes for a stronger joint. The through patch needs a flat surface so constant leveling between each step is required. When I started the process, the top had a belly without any stress on it. Now it is flat and true.
Here is a side profile of my feather joint.
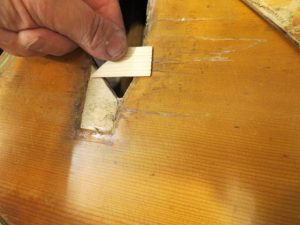
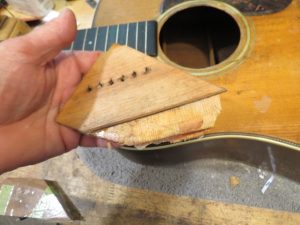
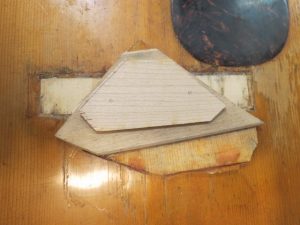
This little piece was one that needed to lay under the top to fill in an area where the spruce was gone. The object was to fill the missing wood and to get the structure secure. I also did the repair with hiding and fish glue so that in the future the repairs can be reversed without more damage. With the pieces fitted, the gluing and reconstruction can now start. I was happy with the strength and stiffness the top now had. The time invested in the prep will pay off instability and structural strength and integrity.
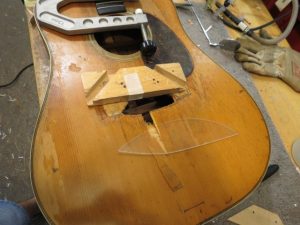
The bridge and notch fills are all secure and the last piece for the top was the through a patch. This was a thickness to .075 and glued in with a flat caul under the top.
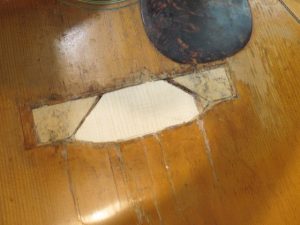
Glued in and secure
The through the patch, as you can see, fits between the X brace and tone bars. This ties all the repairs together. What you see here is the caul that is made to the size of the patch out of UHMW nylon so it won’t stick to the glue.
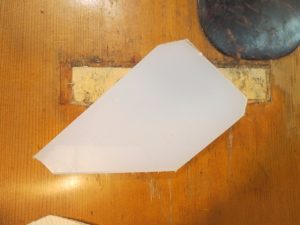
I also use a top caul so the pieces are all pressed nice and flat.

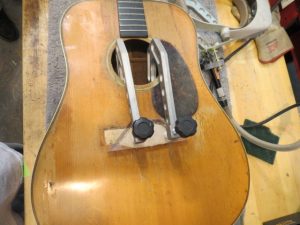
I left the clamps on overnight and checked the top. The patch really made a big difference along with the feathered edges of the bridge fillet. With all the top repair completed, it now came down to the bridge and how it mated to the top. Because of all the previous work, the oversized bridge that was on the guitar will be reused. I cleaned it up and tested the fit.
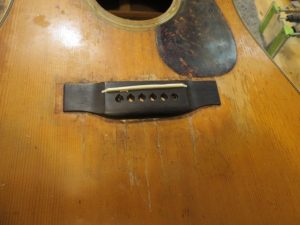
I placed it into the proper position and you can see that some of the repairs shows behind the bridge. I did a little color mix of finish and masked off the area so it wouldn’t be as visible. I can now glue on the bridge plate and bridge. The bridge was used to drill 2 holes through the top and patch so I can precisely locate the bridge plate under the top. I wanted as much plate as needed.
Here is the bridge with top holes exposed. Now the plate can be located and trimmed perfectly. By using the holes I know exactly where the bridge is in relation to the plate and can make one that is going to be no bigger than it needs to be.
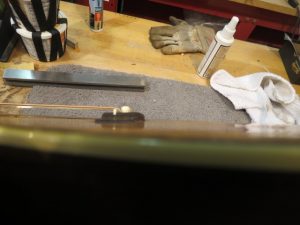
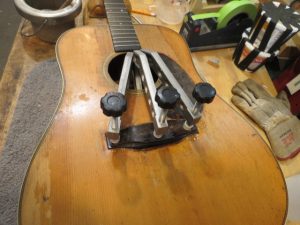
You can see the pencil location marks so I could trim accordingly. I used all Hot Hide glue for this repair and allowed 24 hours clamping time. You can see the before and after of the new and old plates.
This is the new plate on top of the old one. Now, this can be glued in and the bridge set with Hot Hide glue and clamp. I use a small machine screw to locate the bridge so it won’t slip and a leather pad for clamping.
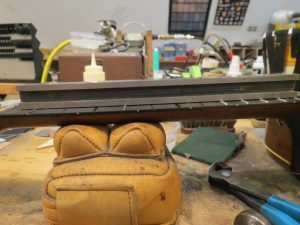
With the top repaired and bridge glued on it was time to address the fret wear and divots on the fretboard.
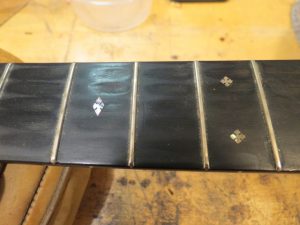
First I needed to pull about 8 frets and then address the divots. I wet the fretboard and used a soldering iron and nipper to pull the frets.
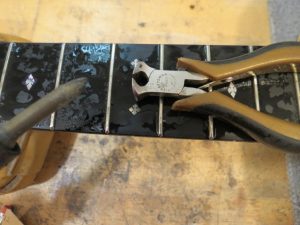
The frets were heated and the nipper used to pull them. These came out without damage. I filled the divots then leveled and radiused the fretboard. I also did a slight chamfer on the fret slots so that in the future the chance of damage is reduced. I did compression fretting on the neck to get the proper back bow for the string load. I used about 12 lbs. and supporting the neck. This way I can get a feel for how the neck moves. These old T bar necks are pretty stout. I ended up using .0225 and .0235 fret tangs to get the neck where I wanted it
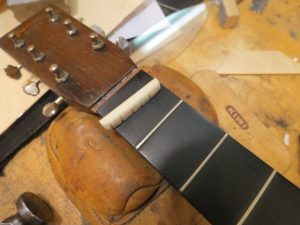
Here you can see I have 3 frets in the span of where I was working. I could then see the neck and how it moved under load. If you look closer you can see a small plastic tub on the guitar. I have two placed there at about 6 lbs. each. This is how I can see where the neck is moving.
As I fret I keep checking and use the proper tang so I don’t put too much back bow or too little. I am looking for about .005 to .007 thousandths of an inch from the 7th fret to the 1st of back bow. With 12 lb weight I want the neck straight or just a touch of relief. I will use the weight when I level the frets to get a perfect relief. With light strings, this is at .003 in.3
Now I can start on the strings. I didn’t like the bone nut as it was too low so a new nut was needed. I had old ivory nuts and made one fit. I started with the outside strings and then spaced them off that.

Now as I set the strings I could watch the top and neck as it takes the load. Because of the work under the bridge, I had to do a little adjusting for the pins to fit. This went quickly and in no time the strings were on and I was pickin’ and grinning!
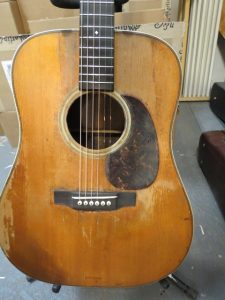
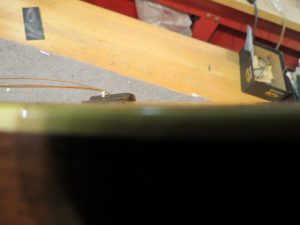
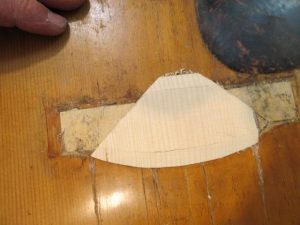
Here is the pick of the top and you can see the belly is all gone